FINISHING AND EXPORTING IMAGES
All images must be finalized before they are exported to the Web, printed, or saved to CD or floppy disk. The method of exporting your images also has a significant impact on how they are used later. When recommending images, please note the following points:
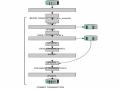
Image file size
View file size
Go to File Open
Maybe you are interested!
-
 Corel Draw graphics application, web design profession, college level - 9
 -
 Corel Draw graphics application, web design profession, college level - 4
 -
 Java programming Web design profession - Dalat College of Technology - 8
 -
 Java programming Web design profession - Dalat College of Technology - 10
 -
 SQL server database management system course, web design profession, Dalat College of Technology - 14
Right click on the file name Property
View Size
File size depends on:
Image resolution
The higher the resolution and better the quality of the image, the larger the file size.
Image size (area)
Proportional to file size
File extension
The file size depends on this extension, like the same image content but the file with the extension .IPEG will be smaller than the file with the extension
.PSD
Color system
Files with 8 bit color system ( Grayscale/Patted...) will be smaller in size than similar files with 24 bit color system (RGB color..) and even smaller than files with 32 bit color system (CMYK color..)
When saving images, the file size must not be too large for the container, such as for a CD it must not exceed 700MB, for a floppy disk (disk A) it must not exceed 1.44MB.
Image resolution
Image resolution is calculated by the ratio of dots (Pixels) on an area ratio, usually Pixel/inch, Pixel/cm.. An image with a resolution of 300dpi means that on an area of 1 inch, the image will have 300 pixels wide x 300 pixels wide.
The larger the resolution of the image, the better the quality, but at the same time the file size containing the image also increases.
Depending on the purpose of use, we apply different resolution values such as images used to upload to the Web, used on a computer screen have a resolution of 72dpi, images
For normal printing, the resolution must be 300dpi.
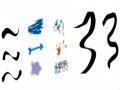
If the image has an inappropriate resolution, when exporting or printing, it will greatly affect the image quality, causing the image to become blurry or broken into jagged lines that can be clearly seen in curved or inclined lines.
Image size
Calculated in units of measurement, most commonly inches, centimeters, pixels (the smallest unit that a computer can display on the screen)
On the CorelDRAW screen, the image size is displayed by the icon
Width and Height
File Extension
This is the part that defines the properties of the image, such as CorelDRAW files are saved with the extension .cdr , Photoshop files are saved with the extension .psd ... then they will retain their separate properties. With the extension .ipg, the file containing the image will be compressed to a smaller size, etc.
Some software cannot open files with extensions that are not compatible with them, such as Adobe Photoshop cannot open the extension
.cdr file of CorelDRAW but conversely, CorelDRAW can import images of files with .psd extension of Photoshop through Import.
Depending on the purpose of use, we export images with different extensions such as images that need to be printed in high quality should use the extension .TIFF, images that are circulated usually use the extension .ipeg , .BMF, icons on the Web page use the extension .ICO , etc.
Color system
Color systems play a very important role in exporting images for different purposes. Please note that when printing, you should export images with the CMYK color system (32 bit). For normal images saved on CDs, normal computers use the RGB color system (24 bit).
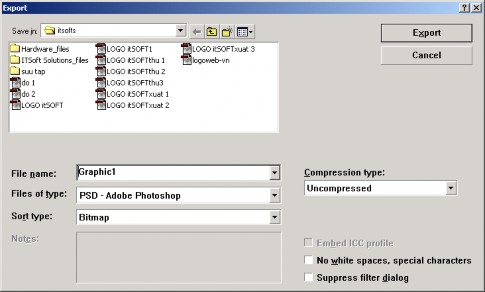
Export image
Click File Export
Or click the Export icon on the Property bar
The Export window appears, enter the information:
Save in : address containing the image to be exported
File name : name of the file containing the image
Files of type : image extension
Selected only : export only the selected part of the image
Click Export
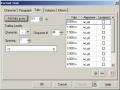
Add a Bitmap Export window appears, enter the information:
Color: color system
Anti-aliasing : softens the color edges of the image
Size : image size according to specific parameters.
Width : width
Height : height
Resolution: resolution
Click OK
Printing
Go to Fileprint : print without reviewing, or click the Print icon  on the standard toolbar
Go to File Print preview : preview the printout
Go to File Print setup: Set up printing modes
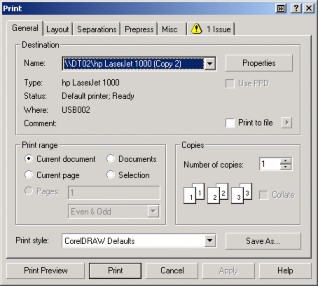
Select printer name
Go to options:
Current document: print the entire file
Current page: print current page
Documents: print multiple files
Selection: print only the selected part
Number of copies: Number of copies.
Click Print