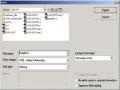
Character: space between characters
Word: space between words
Language: distance between languages
Before Paragraph: space above the paragraph
After Paragraph: space below the paragraph
Maybe you are interested!
-
 Corel Draw graphics application, web design profession, college level - 11
 -
 Corel Draw graphics application, web design profession, college level - 4
 -
 Java programming Web design profession - Dalat College of Technology - 8
 -
 Java programming Web design profession - Dalat College of Technology - 10
 -
 SQL server database management system course, web design profession, Dalat College of Technology - 14
Line: space between lines
% of Char. Height: calculated in % of character height
Indent : distance from margin to:
First line: first line of the paragraph
Left: left side of the paragraph
Right: right side of the paragraph
Text direction: text direction
Horizontal: horizontal
Vertical: vertical
Left Alignment Center Alignment Right Alignment
Tab: space after each Tab key press
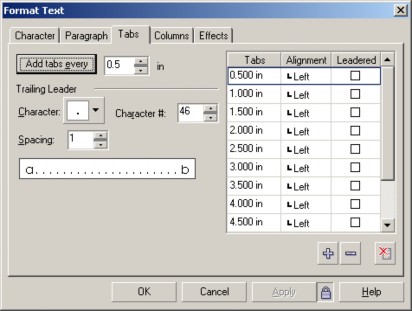
Add tabs every: space is created after each Tab key is pressed
Trailing leader: Trailing leader
Character: character
Character #: character number
Spacing: the space between each leading character
 : add tab
 : delete tab
 : delete all tabs
How to use
Delete all Tabs if you don't want to use those Tabs
In the Add Tabs every box, fill in the number of spaces
Select the leading character in the Character box
Select the spacing between each leading character in the Spacing box
Click on the add Tab icon
To align left, right, center, select in the Alignment panel
To use Leader Character, check the Leader box
Click OK
In the text, use the Text tool to click between the characters you want to separate with Tab. Press the Tab key on the keyboard.

Column: divide text into columns

Number of column: number of columns
Column#: column number
Width: column width
Gutter: distance between columns
Equal column width: equalize column width
Vertical Justification: align with the last column
Paragraph frame width: text frame width
Maintain current frame width: maintain the current frame width
Automatically adjust frame width: automatically adjust column width Effects: effects

Effect type: effect type
Bullet: paragraph header symbol
Drop cap: large character at the beginning of a paragraph
Font: font
Symbol: symbol
Symbol#: character number
Size: size
Baseline Shift: distance from the baseline (negative distance will be below, positive distance will be above)
Indent: distance from text frame
Position: position
Bulleted/Dropped/Hanging Indent: Relative arrangement of the bullet/large character at the beginning of the paragraph and the text
Dropped lines: number of lines occupied by the first large character of the paragraph
Bullet
Drop cap
Faculty of Information Technology - Dalat College of Technology 60
Change uppercase and lowercase letters
Go to Text Change Case

Sentense case: capitalize the first word of the sentence
lower case: lower case
UPPERCASE: uppercase
Title Case: capitalize each word
toGGLE cASE: lowercase letters at the beginning of words and uppercase letters within words.
Enter an additional special character
Click Text tool at the position you want to enter.
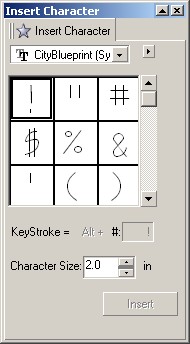
Go to Text Insert Characters
Shortcut: Ctrl F11
Select Font in the Font box
Double-click on the symbol or special character you want to insert or use the mouse to drag the symbol or character into the working window.
Change the parameters of the Character size box below the dialog box to get the appropriate size.
Add an object to the text

Click to select the object

On the Property bar, select the icon, click to open it.
Select one of the functions:
Contour: surrounding border
None: no effect
Text Flow left: text flows to the left
Text Flow Right: text flows to the right
Straddle Text: text wraps around the object
Square: surrounds a square shape
Above/below: above and below
Text Wrap offset: distance between text and image
Use the Pick tool to select the object, drag and drop it into the text cluster.
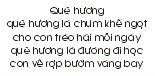
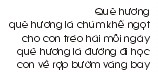
Change character spacing and line spacing using Shape tool
Select Shape tool and click on the text
Drag one of the two arrows to change the space between characters/lines.
Change line spacing
Change character spacing
Split artistic text
Select text
Go to Arrange Break Artistic Text (...) Apart
Shortcut: Ctrl + K
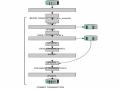
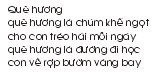
Fill text into an object (curve, circle..)

Select text with Pick tool
Faculty of Information Technology - Dalat College of Technology 62
Add Text Fit Text to Path
The mouse turns into a black arrow
Click on a curve, circle, etc. object, the text will flow according to that object.

Fill text along the border of the frame
Select object with Pick tool
of him
Select Text tool and move from outside to the border
object, click down when you see the transform tool
image
Enter text.
Create paragraph text within frame
Select object with Pick tool
Select the Text tool and move it from the inside to the edge of the object. When you see the mouse turn into an icon  , click down and type the text.
Adjust the relative positions of text and frames
Use the Pick tool to select both the text and the frame.
On the property bar, select the functions to edit
Vertical letter position
Horizontal letter position
Horizontal text-to-object spacing
Curvature of the letters
Text-to-object distance in height
Flip the text

Extract text from objects
Select object with Pick tool
Click Arrange Break Text Apart.
Convert text to object
The purpose of the transformation is to prevent the text from being distorted due to not having the same font used when transferring to other machines or to transform text in logo design, icons...
Click on the text
Select menu Arrange/ Convert to Curve
Shortcut: Ctrl Q