CHAPTER 1 ADVANCED DOCUMENT PROCESSING
Introduce:
To provide knowledge to help students apply specialized functions to improve the quality of documents and save working time. Upon completion of this chapter, students can compose professional documents and save time in performing, printing, checking and protecting documents.
Target:
- Know how to set up the optimal working environment;
Maybe you are interested!
-
 General company of information technology and office equipment trading company - 1
 -
 Developing the capacity to use information and communication technology in teaching Informatics for Ethnic University preparatory students - 1
 -
 Microsoft Excel Office Informatics - Hoang Vu Luan - 8
 -
 Information Technology Applied Informatics Management Research Education - 2
 -
 Evaluating customer satisfaction with savings deposit services at National Citizen Commercial Joint Stock Bank NCB Tan Huong Transaction Office - 3
- Advanced text, paragraph, column, table, ... formatting
- Know how to insert and change footnotes and endnotes. Know how to convert footnotes to footers and vice versa.
- Know how to create and update automatic Table of Contents based on the style and format of the headings
- Know how to insert, edit, delete a hyperlink in a document
- Know how to create a main document and its fields. Know how to create a file list and name the files to be included in the mail.
- Know how to protect a document by allowing only comments and using the change tracking feature
Main content:
1.1. Set up the optimal working environment
1.1.1. Select the appropriate mode and settings
MS Office always sets up some basic features for users, but there is also an option section that can change some suitable features set by users.
1.1.1.1. Quick data formatting
To quickly format data such as changing font, font size, font color... when we highlight a paragraph of text, Word provides a thumbnail tool to help us do this. (Figure 1.1)
Figure 1.1 – Illustration of quick data formatting
By default, when installing Microsoft Office, this thumbnail tool is supported, but in some cases, if this thumbnail tool is not displayed, we will open the Word Option screen to set it up.
Perform:
Go to File Tab / select Options / Select General tab
Check the option “ Show Mini Toolbar on selection ”. Image 1.2
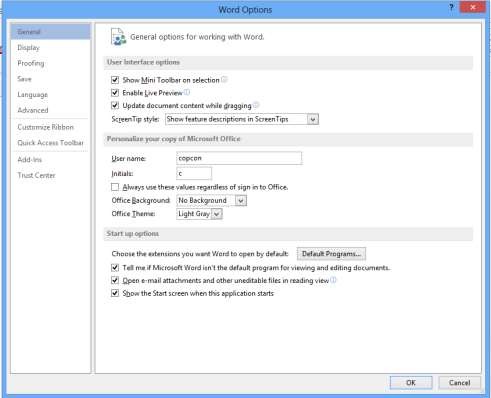
Figure 1.2 - Customization allows quick formatting of data
1.1.1.2. Spell check function
By default, MS Word has the function of checking English spelling and grammar, this function helps to speed up the user's editing speed a lot. However, when we type Vietnamese text, it will be understood as spelling mistakes. Misspelled words will be underlined in red, grammatical mistakes will be underlined in blue.
To turn off the spell check function, do the following:
Go to File Tab / select Options / Select Proofing tab
Uncheck the items in the heading When correcting spelling and grammar in Word. Figure 1.3.
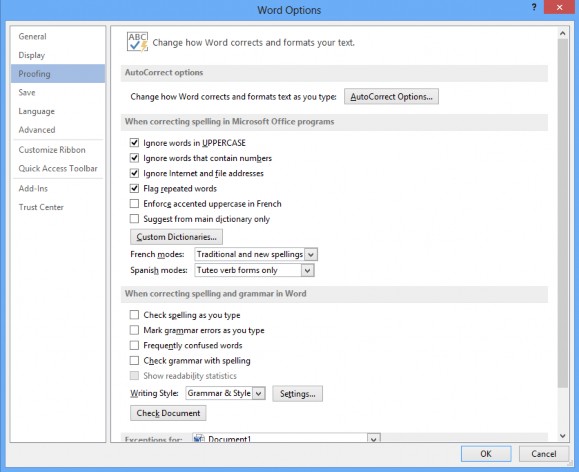
Figure 1.3 - Customize to turn off spell checking
To check for Vietnamese errors in Office 2013, we can download the Vietnamese error checking tool at: http://www.microsoft.com/vi-vn/download/details.aspx?id=35400 .
1.1.1.3. Automatic data saving
One of the extremely important and useful functions is the automatic document saving function of Word. Users rarely save documents during editing, this is very dangerous because the computer can be turned off unexpectedly (broken, power outage...) and all data will be lost. To have Word automatically save the document being edited, we do the following:
Go to File Tab / select Options / Select Save tab
Check the box Save AutoRecover Information every , enter the number of minutes to automatically save (for example 10 minutes). Figure 1.4
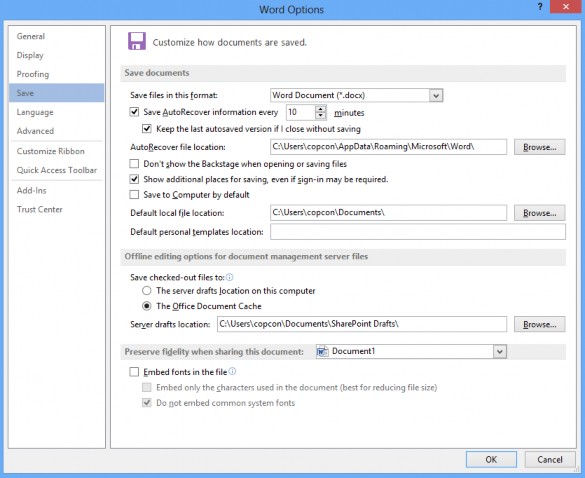
Figure 1.4 - Autosave settings
1.1.1.4. Change the unit of measurement
To have beautiful, standard formatted text pages, we often align the margins before printing. But if the current Word we are using uses inches as the measurement unit, it is difficult to visualize, so we need to change the measurement unit for the document. How to do it is as follows:
Go to File Tab / select Options / Select Advanced tab
In the Display section, re-select the unit in the Show measurements in unit of section: Figure 1.5
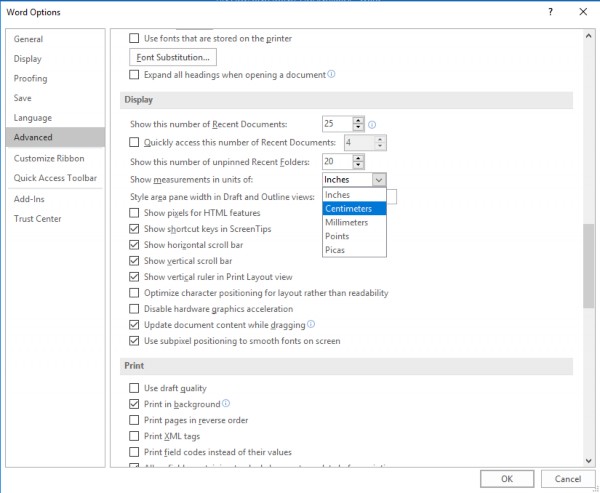
Figure 1.5 - Customize change of measurement unit
1.1.1.5. Display margin frame
The Word margin frame helps us align Word margins more accurately according to current regulations. The margin frame will display dotted lines that create Word text borders so that we can adjust the text limits in each border when editing Word documents. However, by default, this Word margin frame is disabled, making it difficult to adjust Word margins. To display the margin frame in Word, do the following:
Go to File Tab / select Options / Select Advanced tab
In the Show Document Content section , check the Show text boundaries box.
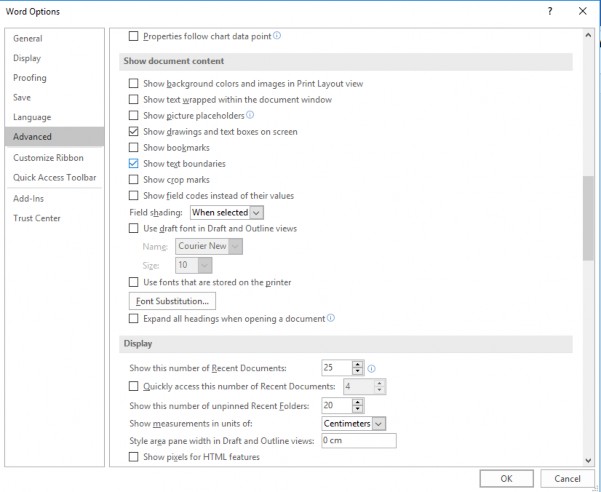
Figure 1.6 – Customize text margin display
1.1.1.6. How to type automatically (AutoText)
To help us save time in writing when we have to type long and repeated text phrases, MS Word 2013 introduced the AutoText feature. Using AutoText helps us to write text quickly and conveniently. In the process of writing text, there are phrases that we often write repeatedly and are very familiar. For example, long phrases such as "Socialist Republic of Vietnam", or "country", or "Limited liability company" ... are phrases that we repeat many times, if we have to write them again, it will be very time-consuming.
Create AutoText:
To create autotext, we first need to highlight the text that needs to be defined, for example the phrase Socialist Republic of Vietnam.
go to the Insert tab , in the Quick Parts group , select the small down arrow symbol, select Autotext → select Save Selection to Autotext Gallery .
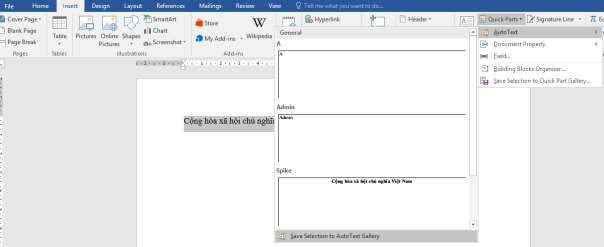
Figure 1.7 - Create AutoText
Enter a short name for AutoText as Vietnam in the Name field , select Gallery as
AutoText , press OK to complete. Figure 1.8
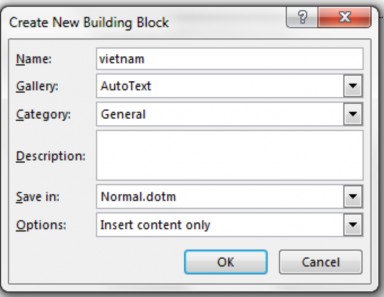
Figure 1.8 – Naming AutoText
Insert Autotext into text:
To insert the created AutoText into the document, just type the exact name to replace (vietnam) and press F3, or click on the AutoText icon and select the text you want to insert.
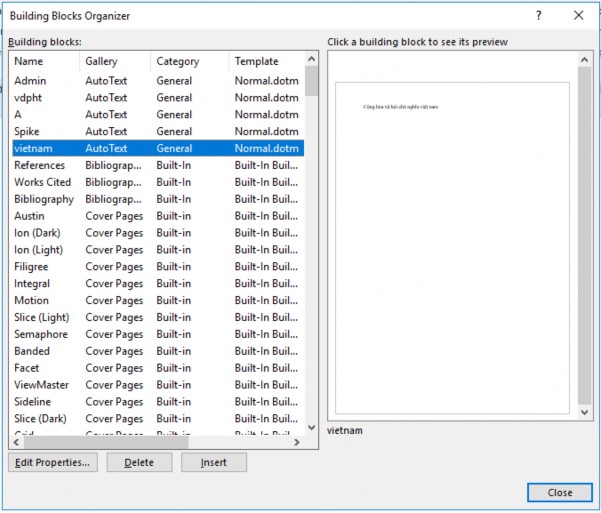
Delete saved AutoText:
Go to the Insert tab , in the Quick Parts group , select the small down arrow symbol, select
Building Blocks Organizer, select the AutoTex name to delete, press Delete . Figure 1.9
1.1.2. Apply the template
Figure 1.9 - List of AutoTexts
Microsoft Word supports users with a series of useful features, helping to edit text and documents faster and simpler. With formats, operations... that are frequently used repeatedly in Word, instead of having to re-enter a series of formats and templates, you can use the Template feature.
Template is a sample file, allowing to create a new file with a pre-made template. Template files can include titles, logos, and other formats. Template files have the extension .dotx.
In Word, there are available Template files, we can use them by selecting File New, a window containing Template templates appears, we choose a template that matches the content of the document. Figure 1.10