-Select tools to design presentations:
Depending on the type of presentation, we choose which tool to design. In Power Point, click on the down arrow in the task pane, select New Presentation , in the pane there will be 4 presentation design styles as follows:
+ Select Blank Presentation to create a new blank presentation. When you select the task pane, Slide Layout appears with 27 pre-designed Slide Outs that you can choose from. From there, a new Slide will be created .
This is a presentation slide
Maybe you are interested!
-

 Teaching Blues to students of the electronic keyboard class at Hai Phong College of Culture, Arts and Tourism - 1
 -
 IT Applications Provide Electronic Tax Services and Contribute to Building "Electronic Government"
 -
 Basic electronic engineering - City College of Construction. HCM Part 1 - 1
 -
 Managing teaching capacity building activities for teachers of high schools in Binh Giang district, Hai Duong province to meet the requirements of educational innovation - 16
 -
 Some Electronic Payment Transaction Means
+ Select Design Template . This is a presentation with pre-defined colors and Slide styles. After clicking this option, the Slide Design task pane appears, you can choose one of the templates.
+ Select Auto Content Wizard Power Point will provide
gives us a basic outline from which to design and organize content into a professional presentation.
+ We can select Existing Presentation to create a copy of an existing Power Point presentation to make design changes without changing the original presentation. When selecting the New From Existing Presentation dialog box that appears, you can browse to find the presentation you want to find.
- Basic operations on the presentation window :
+ Create a presentation, align text , restore the previous one or the one just canceled .
Create a presentation (create a common font for the title and content).: Start the Power Point program
- Click to select the Placeholder box with the title: Click to add title box.
Right click to select the appropriate Font and Size . This will create the Font and Size.
text for the title - topic of the article.
Similarly, Click to select the Placeholder frame with the title: Click to add subtitle box. Right-click and select the appropriate Font and Size . Thus, you will create the Font and Size for the content section.
Method 2: You can go to View => go to Master => Slide Master : Then you click on " Click to edit Master title style " to choose the font and size for the title and click on " Click to edit Master text styles " to choose the font and size for the content of the Slides.
Create background for side:
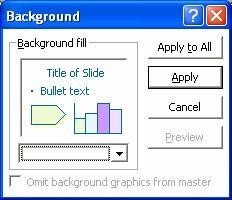
To format the background color for the Slide, click the Format menu and select Background. A dialog box appears as shown below.
Next, click on the Combo box.
(arrow box) to select color.
Finally, click on either the Apply to All or Apply button.
(Apply only works on the current slide, while Apply to All works on
all slides in Presentation)
Text Alignment :
+ Click on the paragraph ( Text Box ) that needs to be edited
+ Click one of the adjustment buttons: Align Left , Center , Align Right

Get back the previous or the recently canceled one :
+ Click Undo Typing on the toolbar or select it on the Edit Menu to return to the previous one.
+ Click Redo Typing on the toolbar or select it on the Edit Menu to return to the previous one
Insert new slide :
+ Go to Inrest Menu , select New Slide or press Ctrl + M
+ Or you can click on the left side of the Power Point page (where the small Slides are displayed) and then press the Enter button on the keyboard.
Insert images, create photo albums, create fonts, create diagrams
+To insert images or create photo albums, fonts, flowcharts and a
Placeholder, you need:
Place the cursor in the Placeholder at the position you want to insert, then go to the menu
Inrest select Picture. In the items you can select Clip Art…, from file…,

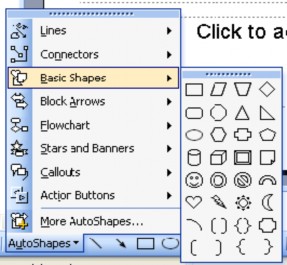
- Draw pictures, create effectsObjects on slide :
+ Click on Auto Shop
on the Drawing bar .
+ Select the icon containing the desired image
draw.
Click on the image you want to draw
+ Bring up the presentation window.
Create effects.
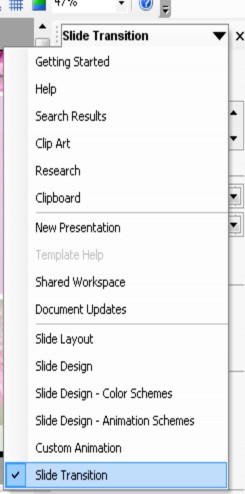
On the Gettng Started task pane , select Slide Trastion
Slide Trastion task pane appears
On the Slide Trastion frame there are some parameters you need to note:
:
No effect
Adjust page transition mode
Page transition effect
sound when moving
Go to next page on mouse click
Adjust the auto page turning interval (minutes and seconds)
Go to next page after specified time
Update information for first slide
Update information for all slides
Create effects for objects: Text, images... on Slide
+ Click to select Text Box (or object to create effect).
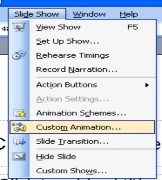
+ Go to Slide Show Menu
+ Select Custom Animation
+ Click on Menu Add Effect
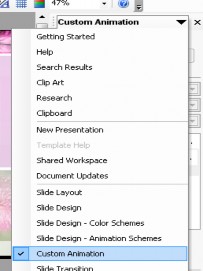
Method 2: on the Gettng Started task pane, select CustomAnimation
+ Task frame appears: Custom Animation
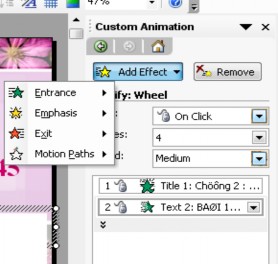
Click to select effect type
Click
On this task pane you can choose from Entrane , Emphasic or Exit, depending on the idea you want to design. In each of these sections there are many sub-sections, each section is a different effect for you to choose from.
+ Below is the section: Entrane ( enter),
Remove selected effect
Click to select effects
Click to display the dialog box:
Add entrence effect
Click to adjust the effect start time
Click to adjust the speed of the effect during the performance.
You can click on the word Timing to bring up the Wheel dialog box (below) and adjust it in this dialog box:
Click to adjust the effect start time
Click to adjust the delay between objects during presentation.
Click to adjust speed
Click to adjust the number of iterations
Click to go back to the beginning
Click
+ For items: Emphasic (highlight, animation) or Exit (go out), you also choose and adjust the same effect.
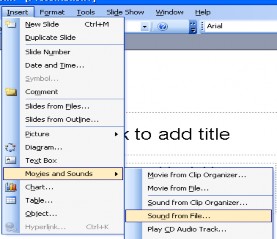
- Insert Film - sound :
+ Go to Menu Inrest, go to Movies and Sound, go to Sound From File . This will take you to the place to get the sound you need to install.
- Save: To save the slides you just created, you can save them in the following way:

+ Click on the floppy disk icon on the toolbar
tool
+ The Save As dialog box appears
+ In the Save In section , save the document to the desired location.
+ File name : you name the file
+ After completing, press Save or Enter
- Method 2: You can click on the file menu on the toolbar, select Save As
then do the same.
+ The saved file has the extension : ppt
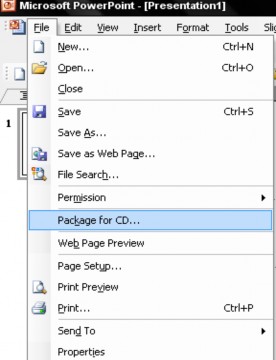
Pack
+ On the menu bar, select File => select Package for
+ The Package for dialog box appears, you perform the following steps in sequence
3. Click to edit parameters.
1. Enter CD name
2. Click to Add Files to Pack
6. Click
4. Adjust the folder to save the presentation package.
5. Copy to CD
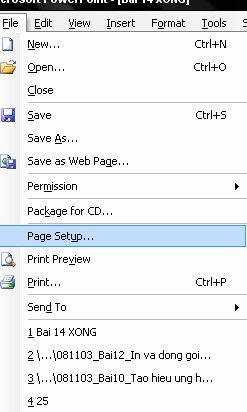
Print .
Go to file menu => select Page Setup => Page Setup dialog box appears :
Select paper size to print
Click