Attention:
NAT can translate addresses according to:
+ One - One
+ Many - One
=> An internal address can be converted to a valid external address or vice versa.
NAT Pool: Allows converting internal addresses into a range of Public addresses.
3. NAT in Windows server.
Target:
- Present the concept and components of Nat in Windows server
- Configure NAT on Windows server
3.1. Win 2003 provides the concept of NAT
NAT is concerned with connecting LANs to the Internet, NAT allows small networks to connect to the Internet as in the case of IPSec. Therefore, only one public IP address is needed to connect a large number of networks to access the Internet.
- NAT server also needs the address of an internal LAN, outside users cannot see the address of internal servers, thereby protecting against attacks from the Internet.
- Win 2003 NAT includes the following components:
+ TRANSLATION: Is a computer running Win 2003 with Nat function, it plays the role of a converter of IP addresses and port numbers of internal LAN to external Intranet servers.
+ ADDRESS: Is a computer that acts as a network address converter, it provides IP address information of computers + the network is considered a DHCP server that provides information about IP address/ Subnet Mask/ Default Gateway/ DNS Server...
In this case all computers inside the LAN must be configured as DHCP clients.
+ Name Resolution: Is a computer network that acts as a NAT server but is also a DNS server. For other computers in the internal network, when the Client sends a request to the NAT Server, the NAT Server forwards it to the DNS server to change the name and forwards the result back to the NAT and the NAT server forwards the result back according to the request.
3. 2. NAT operation:
When a Client in the local network sends a request -> NAT server sends its data containing the IP address, private address and port address in the IP Header. NAT Server converts this IP address and port address into its public address and address and then sends the data packet.
With this new IP Header to a host or a Server on the Internet. In this case, the NATserver must retain the IP address and port address of the Client request in the local network to have a basis to forward the result to the Client later.
When receiving a request from an Internet host, the NATserver will change the packet's Header to the original Header and send it back to the requesting Client.
3.3. Installation and configuration:
Analyze the following rule table:
Rule
S_Addr | D_Addr | Service | Action | log | NAT | |
A | Firewall | Any | Any | Permit | Yes | |
B | 192.168.1.0 255.255.255.0 | Firewall | Any | Permit | Na | |
C | 192.168.1.15 | Any | Any | Permit | No | Nat(LAN) |
D | Any | Firewall | TCP/80 | Permit | Yes | MAP 192.168.1.15 |
E | Any | Any | Any | Deny | Na |
Maybe you are interested!
-

 Measure 4: Make Tools and Toys to Use in Children's Play Activities
 -
 Computer Structure - Hanoi Industrial College - 15
 -
 Deviant Behavior of PCT Group in High School Students (%, N=448)
 -
 Dpcsv Curve And Standard Addition Graph For Determination Of Selenium Form In Aqueous Phase After Defatting With 5ml N-Hexane (1 Time)
 -
 Computer Architecture Course - 10
- Law A does not allow machines in the internal network to go out.
- Law B allows Client machines in the internal network through the Firewall to use all services, not record saved files, NAT cannot only point to the Firewall's destination.
- Rule C allows machines with the above source addresses to go through the internet with any service, without rewriting the file saved using NAT in the LAN.
- Rule D allows from outside with Firewall using TCP protocol with port 80 (http protocol)
- Default E Law
Student practice exercises
Question 1: Compare static Nat and dynamic Nat
Question 2: Present the concept and operating mechanism of Nat in Windows Exercises
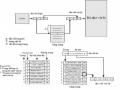
Implement Nat on Windows Server 2003 platform according to the following model.

I.NAT outbound (NAT out) 1. Configure PC09 as NAT Server
Step 1: Open Routing and Remote Access -> Right click on NAT Server (PC09) select Configure and Enable Routing and Remote Access -> In Welcome select Next -> In Configuration select Custom configuration box -> Next

-In Custome Configuration -> Check the box NAT and basic firewall
and Lan Routing -> Next -> Finish
Note: When the system configuration process ends, it asks to restart the Service, select Yes.
B2: In Routing and Remote Access , right-click on NAT/Basic Firewall , select New Interface -> in New Interface for Network Address Tranlation (NAT) -> Select LAN card -> OK

-In Network Address Translation Properties -> LAN Properties -> Select the box Public interface connected to private network -> Check the box Enable NAT on this interface -> OK
B3: Similar to B2 In Routing and Remote Access , Right-click on NAT/Basic Firewall , select New Interface -> in New Interface for Network Address Tranlation (NAT) -> Select LAN card -> OK
-In Network Address Translation Properties -> CROSS Properties -> Select the box Private interface connected to private network -> OK

Step 4: In Routing and Remote Access -> go to IP Routing -> Right click on Static Routes and select New Static Route… -> In the Static Route window, configure
as follows:
Interface: LAN
Destination: 0.0.0.0
Network mask: 0.0.0.0
Gateway: 192.168.1.200 (gateway to the Internet)
Metric: 1
-> OK
Note: Gateway must have the same NetID as the LAN card IP address

Step 5: In Routing and Remote Access -> Right click on PC09, select All Tasks -> Restart
2. Check the results
All machines in NetID 10.0.0.0/8 can access the Internet. We can use the Tracert command (analyze the path of data packets) to check.

II.NAT Inbound

1. Configure Web Server on PC08
Step 1: Start -> Programs -> Administrator Tools -> Configure Your Server Wizard -> Next -> Select Application Server (IIS, ASP.NET) -> Next . Follow the instructions to complete the installation.
Note: During the IIS installation process , point the path to the I386 folder in the Windows Server 2003 CD when the system requests.

Step 2: Open Windows Explore -> Go to folder C:Inetpubwwwroot -> Create file
index.htm has content (eg: Welcome to website)
Step 3: Open Internet Explore -> Access the IP address or Webserver address Note: Check if you can access the newly created website2. Configure NAT Server on PC09
Step 1: Open Routing and Remote Access -> select NAT/Basic Firewall -> Right click on LAN and select Properties

-select the Services and Ports tab -> Drag the slider down to select the item
Web Server (HTTP)

-In the Edit Service section, enter the IP address in the Private Address box: