However, they also have basic differences as shown in the Table.
5.3 as follows:
Table 5.3. Comparison of information backup and redundancy
Feature
Backup information | Information backup | |
Purpose | Support system recovery when there is an incident, returning the information system to a state at a specified time before the incident occurred or returning the information system to any time, even if no incident occurred. | Support to increase the fault tolerance of the information system, helping the information system to perform more effectively. |
Working principle | The system accepts the possibility of error, accepting the possibility of loss of information by replacing it with a previous backup. | The system does not accept errors that appear on the outside, does not accept loss of information, and tries to fix errors so that users do not realize that the information system has a problem. |
Advantage | Backups are stored in a location away from the current information system to ensure information safety in case of incidents occurring in the information system. It is possible to restore the information system if the backup is not corrupted. | Low administrative costs. Bring satisfaction and reliability to users in information systems. |
Disadvantages | There are administrative costs because backup planning, cost considerations, equipment purchase, assembly, installation, scheduling of backups for information, and consideration of where to store copies are required. There must be a mechanism to manage backups so that the information system can be restored. | Not completely fault tolerant, so there is no guarantee that information will be recovered if a failure occurs to the information system. |
Application | Backup is suitable for applications that require high information security and do not require high access speed such as email, files, digital databases, etc. | Suitable for servers that run continuously and require moderate fault tolerance such as information storage systems at bank transaction offices and client/server information systems. |
Maybe you are interested!
-

 Classification of Drug Safety Levels for Pregnant Women
 -
 Situation of Information Technology Application in Enterprises
 -
 Solutions for Security and Travel Safety
 -
 Classification Table of Overdue Debt Ratio by Collateral of Seabank
 -
 Summary of Information on the Subject's Capacity and Training Level
5.2.2. Classification of information backup and redundancy mechanisms
5.2.2.1. Online information backup
Online backup is a method of backing up information that is read or transmitted over the Internet from a server or a backup server to a secondary medium or storage system. The backup server is responsible for receiving the information and performing additional operations to optimize the information before writing the information to the secondary device.
It is possible to index information for easy searching, retrieval and to reduce the size or capacity of information by (compression, pc,...), it is possible to encrypt information to protect it during sending and transferring between the server and storage device.
Advantage:
- Can consolidate and manage backups from multiple information systems.
- High security if information is compressed or encrypted.
- Time can be found to recover information.
- Can be integrated into information systems for information retrieval.
Disadvantages:
- Requires stable Internet connection.
- Costly, especially if the information system expands and needs to be developed and upgraded.
5.2.2.2. Back up information on-site
On-site backup is the backup of information transferred to the secondary storage device of the backup device right at the office or to the active storage devices. Secondary storage devices are usually hard drives, CDs, memory cards, etc. Usually, secondary devices such as removable drives, hard drives, and other devices are used as backup data storage devices.
Advantage:
- The cost is not too high
- High security if the backup device is stored away from the current location
- Can help restore information systems at many different locations
- Can be integrated into information systems for information retrieval
- Flexible and adaptable to any storage system.
Disadvantages:
- Requires consideration of the number of devices, the capacity of each device, the security and storage time on each device
- Multiple locations are required to store and maintain backup equipment.
5.2.3. Some Windows backup and backup tools
Windows operating system is currently one of the operating systems with the largest market share in the world, so in this section, the course introduces some ways to backup on Windows operating system available to users.
5.2.3.1. History file
File History, this is a useful backup feature that was first integrated and introduced on Windows 8 and this tool reappears on Windows 10. The tool is still considered a useful option for backup, so the History file is integrated on both the Settings and Control Panel tool, while the Windows 7 backup feature is only available on the Control Panel. The History file also has a limitation, which is that the tool only backs up files and user information on the computer, but cannot back up and restore the entire operating system. You can add drives or folders to back up to ensure the safety of important information. Once completed, Windows will automatically create backups, copy files and information, and can be used.
These backups are to restore all files, information if accidentally lost, can restore in bulk or restore only one or a few specified files, folders.
5.2.3.2. Backup and Restore
The Backup and Restore function on Windows 7 is also integrated by Microsoft into Windows 10, although this tool also appeared on Windows 8 but was removed in Windows 8.1. Backup and Restore is also known as Windows Backup. This tool allows you to use an old backup from Windows 7 to a computer using Windows 10. Unlike the Fle History backup solution, you can use Backup and Restore to easily create a backup of everything on your hard drive. You can find the Backup and Restore tool from the Windows 10 Control Panel or type the search keyword " backup" , then click Setup backup to start setting up the backup.
5.2.3.3. OneDrive
OneDrive is a cloud storage solution, files stored on OneDrive will be stored in the user's OneDrive account online, users can access files anywhere and on any device. When using Windows on another device, users just need to log in to their Microsoft account and all OneDrive files will be available in File Explorer.
5.2.3.4. Reset This PC function
The Reset This PC function is a feature that cleans the operating system and returns Windows to its original default settings for use if an error occurs. This feature is also a necessary option so that users never have to reinstall Windows from scratch using a DVD or USB drive. On Windows 8, users have the options Refresh this PC and Reset this PC. On Windows 10, there is only one option, Reset this PC. Just open the Settings application, then select Update & security => Recovery and click
The Get Started button is located under Reset this PC. Either select Keep my files or select Remove everything.
5.2.3.5. System Image Backups
System Image Backups is a feature that can be found by opening the Control Panel and searching for Backup and Restore (on Windows 7). Just click “Create a system image” in the left corner of the window or open the File History panel and select “System Image” in the sidebar. Unlike the methods mentioned above, System Image Backups allow users to create an image file of the entire current Windows system, including the operating system, installed programs, settings, and user files. This backup can be stored on an external hard drive, burned to a DVD, or on a network storage drive.
5.2.3.6. Advanced options
The advanced options built into Windows 10 are similar to those in Windows 8. To access the advanced options, first open the Settings app => Update & security => Recovery and then click Restart now under Advanced startup. Additionally, users can press the Shift key when selecting Restart on the Start Menu, to restore Windows from a system image file that the user has created, use the system restore tool to fix errors and perform other system maintenance tasks.
5.2.3.7. Recovery Drive Creator
Recovery Drive Creator. Users can create a system recovery USB, allowing access to advanced options, users can open Control Panel then type "Recovey" in the Search box, select the Recovery icon and search in the list of advanced recovery tools, then use Create a recovery drive to create a recovery USB drive. Additionally, users can type RecoveryDrive.exe in the Search box on the Start Menu and press Enter to access
access the tool directly or boot from a drive that the user has created to access the recovery tools if Windows 10 does not allow access the usual way. Windows 10 no longer provides a separate recovery partition, so this tool will not allow the removal of recovery partitions from the user's computer.
5.3. RESTORE INFORMATION AFTER A FAILURE
5.3.1. Corrupted information and information recovery
As mentioned in section 5.2, information loss can come in many forms: accidental deletion of files, hard drive failure, software errors, file corruption, hacking, deletion, and even a computer running but losing power can result in information loss. Information loss can occur with any information storage medium in today's technological world, from HDD, SSD, USB flash drive, SD memory card, microSD memory card, even RAID storage systems consisting of multiple drives are still capable of losing information.
The process of recovering information can be understood as the process of searching for lost information, then if necessary, repairing this information so that it can be read by the corresponding software. There are many methods to recover information, but people often choose the appropriate method depending on the reason for the loss of information.
Some causes and corresponding information recovery measures:
Logical damage or deleted files: In this case, the first thing the user needs to do is stop all saving, writing, copying, cutting and pasting of files, to let the machine operate at a minimum level. Then, use information recovery software provided for free or for a fee on the Internet to recover your information.
Formatted drive: Similar to deleting files, formatting a partition or a drive will erase information about previous files as well as their structure, however the information still exists more or less on the drive depending on the system's file formatting method.
To handle the situation of a formatted drive, recovery software is often used, but the amount of information recovered will not be as much as when recovering mistakenly deleted files.
Physical damage : Physical damage is damage or failure such as broken or damaged drives, scratched magnetic disks, damaged reading heads, burned circuit boards, etc. The recovery process from physical damage is complicated and the probability of recovering information is also lower than that of logical damage and formatted disk cells. The solutions for physical damage are also very diverse. In the case of a drive with too many damaged components, the drive will be replaced.
5.3.2. Information recovery using software
In this section, the course introduces some popular and easy-to-use software for users in the data recovery process. Each time the software can change, however, they can help users recover according to some basic principles, or basic errors.
5.3.2.1. EaseUS Data Recovery Wizard software
EaseUS Data Recovery Wizard is an advanced and best deleted information recovery software on computers, allowing to recover information in cases such as formatted partitions, lost partitions due to accidental deletion, software conflicts, virus attacks, sudden power off or any other unknown reasons.
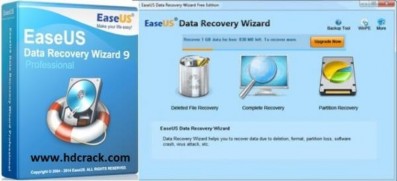
Figure 5.1. EaseUS Data Recovery Wizard software
This software supports a wide variety of hardware, including hard drives, USBs, SD cards, memory cards, etc. The process of recovering information using this software is as follows:
Step 1: Download and install EaseUS Data Recovery Wizard software.
Step 2: Use and select the information formats to recover. After successfully downloading and installing the software on your computer, open the software and select the formats of the information you want to recover, such as on Desktop, Windows Libraries, hard drive, USB... then click Scan for the software to start checking.
Step 3: Select format and recovery mode. By default, the software will check the partition with two modes: Quick Scan and Deep Scan. Users can monitor the completion time through the progress bar above. Deep Scan mode is quite useful in case the required file is not found from the first scan or the file to be recovered cannot be opened. The scanning time of this mode will be longer than Quick Scan mode.
Step 4: Select the data recovery partition. When completed, the results will be listed and divided into two categories, Quick Scan result and Deep Scan result. For faster results, users can classify files by format, such as Graphics, Audio, Document, Video, Email and Other through the corresponding function buttons. EaseUS Data Recovery Wizard allows previewing files before recovery, users can change the display mode through the small buttons in the lower right corner.
Step 5: Complete the recovery process. To recover important files, check and click Recover, then choose a storage location. When you want to save the test results, just click on the Export Scan Status option. Later, you can restore the results at any time without having to spend time re-scanning all the information.